How to Blend Acrylic Paint: Techniques for Smooth Color Transitions
Blending acrylic paint smoothly is a skill that can enhance any painting by creating seamless color transitions and depth. Because acrylics dry quickly, mastering blending requires understanding the paint’s fast-drying nature and using appropriate techniques such as wet-on-wet or dry blending. The key to blending acrylic paint effectively lies in working with wet layers quickly and using the right brushes and tools to control how colors merge.
Effective blending involves selecting complementary colors and applying them while the paint is still wet, allowing for smooth gradients. Tools like flat, fan, and filbert brushes each serve specific functions in blending large areas or fine details. Thinning the paint slightly with water or mediums can also extend drying time, making blending easier without compromising color vibrancy.
Artists can use a combination of technique and preparation to improve their blending results. Organizing a clean workspace, having good lighting, and avoiding common mistakes like overworking the paint or using too much water all contribute to successful acrylic blending. With practice, blending acrylic paint becomes a controlled, creative process rather than a rushed challenge.
Essential Materials for Blending Acrylic Paint
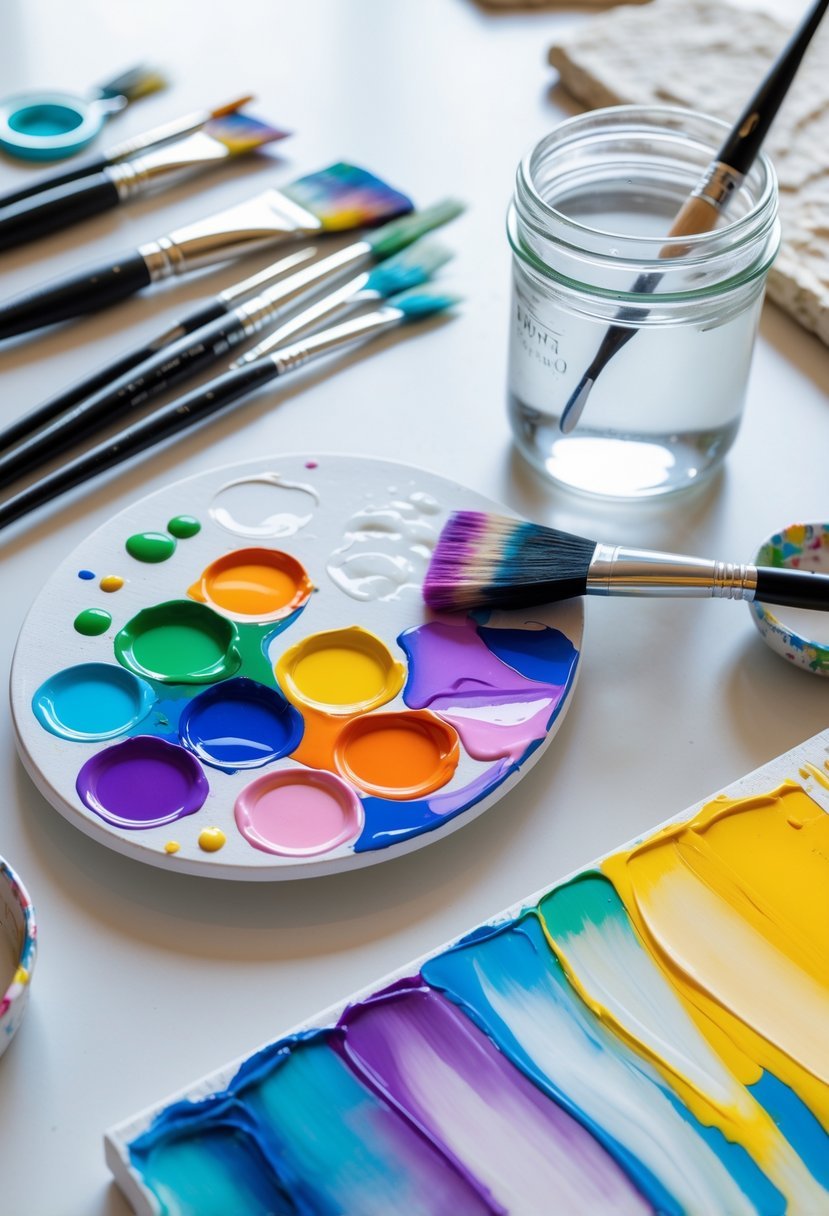
Successful blending depends heavily on the selection and preparation of materials. Attention to paint type, brushes, mediums, and workspace setup helps maintain control over drying time, color transitions, and texture.
Choosing the Right Acrylic Paint
The choice of acrylic paint affects blending quality. Heavy body acrylics, with their thick consistency and high pigment load, are excellent for texture but dry quickly, limiting blending time. Fluid acrylics or soft body paints offer smoother, more extended working times, making them preferable for seamless gradients.
Brands like Golden Artist Colors and Liquitex Basics provide reliable consistency and color vibrancy. Using a standard palette including primary colors, white, and black ensures flexible mixing options.
Slow drying mediums can be added to extend working time. These allow artists to blend colors wet-on-wet without premature drying. Proper paint selection reduces frustration and improves final results.
Selecting Effective Brushes for Blending
Brush choice influences blending technique and texture. A variety of synthetic brushes with specific shapes caters to different blending needs.
- Flat brushes cover large areas and create smooth blends.
- Round brushes offer precision for smaller transitions.
- Filbert brushes, with their rounded edges, handle curved blending effectively.
- Fan brushes soften edges and produce subtle gradations.
Synthetic brushes are preferred for acrylics due to their durability and resistance to water damage. Mop brushes can also aid in gentle blending by softening wet paint layers.
Maintaining clean, damp brushes during blending avoids muddy colors and helps control transitions.
Mediums and Additives to Enhance Blending
Adding mediums adjusts paint properties essential for blending. Slow drying mediums, such as fluid retarders, delay drying time without compromising paint adhesion. This grants extra working time for wet-on-wet blending.
Acrylic glazing mediums thin paint while maintaining opacity, allowing for transparent layers that enrich color depth and transitions. Glazing mediums enhance layering techniques, important for subtle blends.
Combining these additives responsibly prevents over-thinning, which can weaken paint films and reduce vibrancy. Medium selection should align with the desired effect and workflow pace.
Palette Setup and Painting Surface Preparation
Efficient palette organization streamlines blending and reduces drying waste. Use a stay wet palette to keep acrylic paints moist longer, extending blending time.
Arrange paints by color and tonal value to facilitate quick mixing and logical transitions. Palette knives assist in clean, consistent color mixing.
Prepare the painting surface by ensuring it is clean and primed for acrylic use. A smooth, non-absorbent surface supports easier blending and preserves paint layers. Lighting also plays a role; bright, natural or white light helps accurate color perception during blending.
Core Blending Techniques for Acrylic Paint
Blending acrylic paint involves controlling drying time and paint consistency to achieve smooth transitions and soft edges. Different techniques cater to various effects, surfaces, and skill levels, allowing artists to choose methods best suited for their project’s demands.
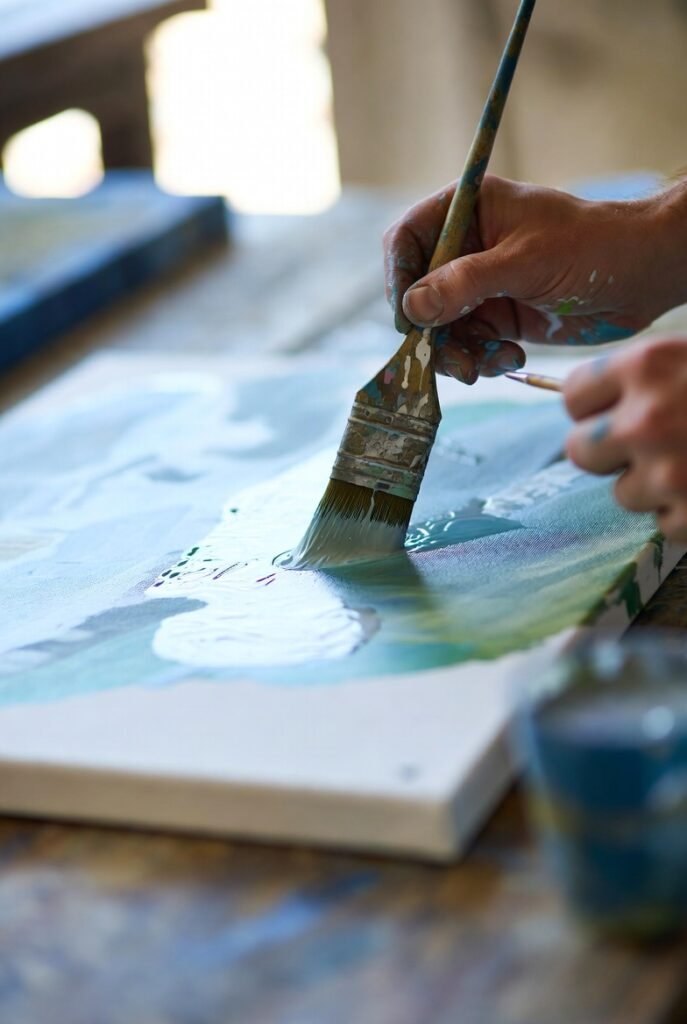
Wet-on-Wet Blending
Wet-on-wet blending requires applying two or more colors while the paint surface is still wet, allowing them to mix directly on the canvas. This technique produces seamless gradients and soft edges, making it ideal for backgrounds, skies, or organic forms.
Artists usually thin their acrylic paint slightly with water or a slow-drying medium to extend working time. A soft, flat, or mop brush works best to gently blend the wet layers in a side-to-side or circular motion. Controlling the amount of water is essential to avoid over-thinning, which can cause pooling or transparent washes resembling watercolor.
This method demands quick work before the paint dries but offers natural color transitions and dynamic gradients.
Wet-on-Dry Blending
Wet-on-dry blending involves layering wet paint on a dry base layer. The artist first covers the surface with a solid color, allowing it to dry fully. Then, a second color is applied over the top and blended carefully to the edge of the base coat.
This technique offers more control and less risk of unwanted mixing, making it suited for sharper transitions and glazing effects. Thinning the top color with water or medium helps with smoother blending.
Using a soft, slightly damp brush to feather the transition edge allows a subtle gradient between colors, avoiding harsh lines while preserving distinct color zones.
Glazing Method
Glazing uses thin, transparent layers of acrylic paint applied over dry paint to build depth and luminosity. This blending technique is effective for adjusting color intensity, creating smooth tonal shifts, and enhancing shadows or highlights without reworking the base layer.
Glazes consist of paint diluted with glazing medium or acrylic medium rather than water, preserving the paint’s binding strength. Multiple thin layers are applied successively, with each layer drying before the next is added.
This method is well-suited for fine details and subtle color corrections, providing controlled blending and a polished finish.
Dry Brush Blending
Dry brush blending blends acrylic paint with minimal or no water on a dry brush, working with paint that is semi-dry or just applied. This allows for more texture and visible brush strokes while softening edges between colors.
Commonly done with a flat, stiff brush, dry brush blending scrubs or lightly drags paint over the surface. The artist loads the brush with paint and blends colors by brushing over the boundary area repeatedly, building layers that transition softly but retain some texture.
This technique is useful for scumbling—creating broken, textured blends—and adding subtle gradation without overly smooth or wet appearances.
Advanced Approaches to Blending Acrylic Colors

Effective blending involves both direct manipulation of wet paint and understanding how colors interact visually. Techniques range from physically mixing colors on the canvas to creating the illusion of smooth transitions through layering and color perception.
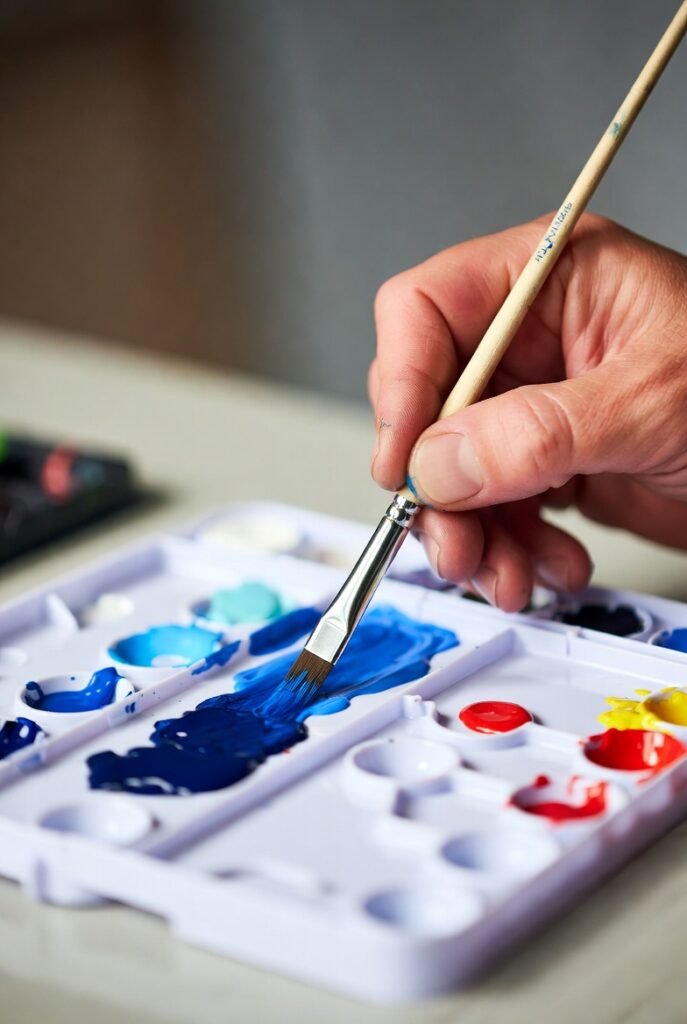
Physical Blending on Canvas
Physical blending refers to the actual mixing of two or more wet acrylic colors directly on the canvas surface. This approach requires working quickly because acrylic paint dries fast. Artists typically use a soft, clean brush or a palette knife to merge adjacent colors through gentle strokes or dragging motions.
Key factors for success include maintaining the right paint consistency—too thick, and the blend will appear patchy; too thin, and the paint will lose vibrancy. Using retarders or blending mediums can extend drying time, allowing more time for smooth transitions. Physical blending is especially effective for gradients, skies, or skin tones where subtle shifts in hue are crucial.
Optical Blending and Color Perception
Optical blending relies on placing distinct colors close together so the viewer’s eye mixes them at a distance rather than physically blending on the paint surface. This method uses the science of color perception, employing techniques like pointillism or small brush strokes that layer complementary or analogous colors.
This technique benefits from careful color mixing and understanding how adjacent hues impact each other. It can create vibrant textures and dynamic visual effects without the need for physically mixed paint. Optical blending works well in textured paintings or when dry brushing to achieve a soft focus effect in acrylic artworks.
Double Loading and Layering Techniques
Double loading involves applying two or more colors on a single brush to create a blended effect in one stroke. This requires precise brush handling and a wet canvas surface. The brush picks up different pigments on separate edges, and as it moves, those colors blend together immediately.
Layering differs by applying successive dry layers of paint, using glazes or thin washes to build depth and smooth color transitions over time. Each layer modifies the perception of the one beneath, allowing gradual shifts without direct mixing. Both techniques demand understanding of acrylic drying times and transparency, helping artists create effects ranging from soft gradation to defined textures.
Mastering Brushes and Tools for Seamless Blends
Choosing the right tools is fundamental to achieving smooth transitions and professional-looking blending. Different brushes and implements offer unique effects depending on their shape, bristle type, and the way they interact with acrylic paint.
Best Brushes for Specific Effects
Flat brushes are highly effective for creating clean, even gradients, especially when using synthetic bristles. Their firm edges help control the progression of colors without blending into unwanted areas. For soft transitions and delicate feathering, a blending brush with slightly softer bristles works well.
For detailed work such as blending skin tones or subtle color shifts, a small round brush allows for precision. Dry mop brushes are excellent when layering subtle blends without overworking the paint. They help spread color gently without lifting underlying layers. A dry brush technique with stiff bristles is also useful for textural blending on rough surfaces.
Using Mop, Fan, and Specialty Brushes
Mop brushes are prized for their large, soft, and highly absorbent heads. They efficiently hold diluted paint, enabling smooth, watery blends—ideal for backgrounds or atmospheric effects. Using a dry mop brush with little to no water provides control over soft yet distinct gradients.
Fan brushes offer a different approach; their spread bristles create natural feathered effects by lightly brushing over dry or semi-dry paint. This is particularly good for cloud textures or fur. Specialty brushes like makeup blender brushes can serve as affordable alternatives for delicate blending with soft synthetic fibers.
Applying Palette Knives and Non-Brush Tools
Palette knives are less about seamless gradients and more about creative blending effects. They spread paint thickly, blending colors as they drag across the surface. This technique works best with thick or slow-drying acrylic mediums. Palette knives allow artist-driven control of texture and merged color patches rather than smooth, subtle transitions.
Non-brush tools such as sponges or fingers can complement blending by diffusing edges or softening harsh lines with a tactile approach. Their irregular surfaces produce irregular blends that can appear more organic or abstract, useful in certain styles of acrylic painting.
Using the right combination of brushes and tools tailored to the desired effect helps artists achieve both refined gradients and expressive blends in acrylic works.
Color Theory and Mixing for Effective Blending
A clear understanding of how colors interact is essential for blending acrylic paint successfully. Knowing how to mix primary and secondary colors, manage gradients, and control value and temperature ensures smooth transitions and vibrant results.
Understanding Primary and Secondary Colors
Primary colors—red, blue, and yellow—are the foundation of all color mixing. These colors cannot be created by mixing others but combine to make a broad spectrum of hues. When two primary colors mix, they produce secondary colors: green, orange, and purple.
Artists often start with a limited palette based on these primary colors, adding white or black to adjust tint and shade. This approach helps maintain color harmony and control during blending. Understanding which colors to mix and how they influence each other prevents muddy results and supports more precise color creation. For example, mixing equal parts of blue and yellow yields green, but varying the ratio can change the green’s tone, enabling subtle variations in blends.
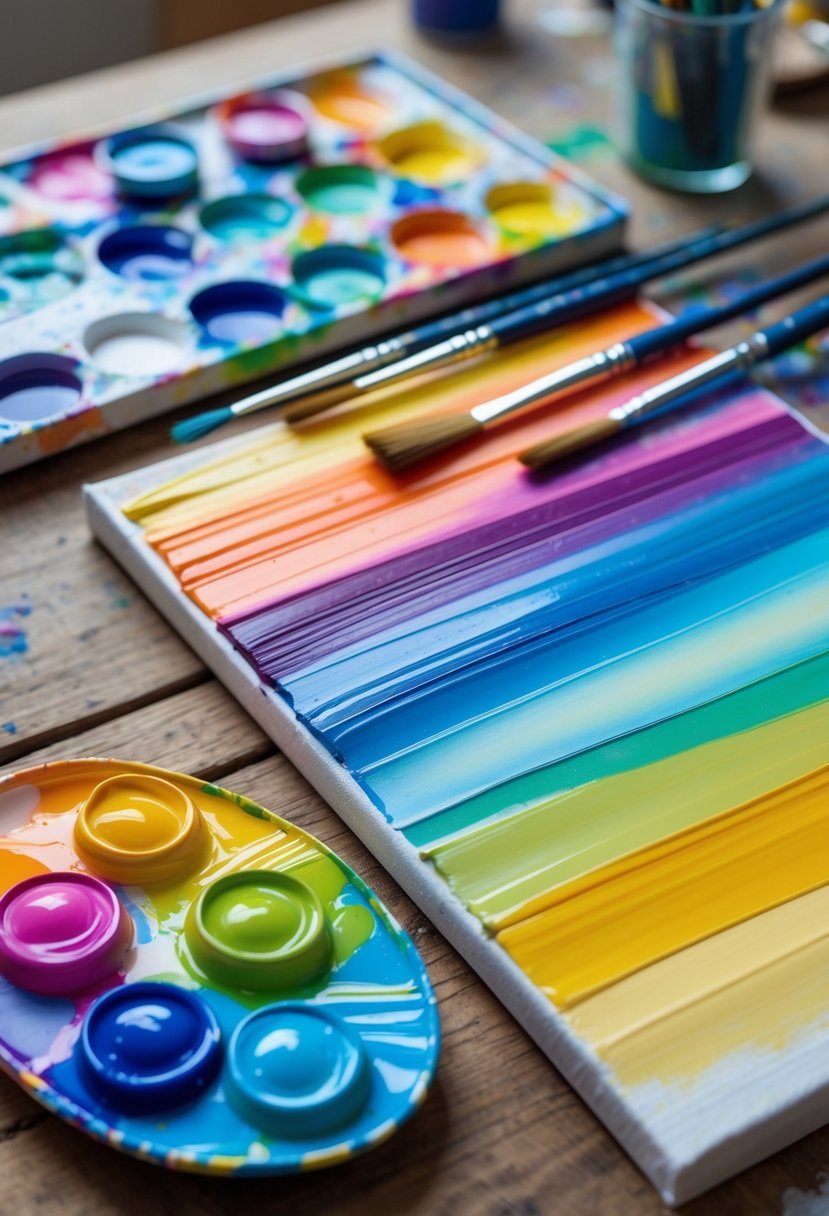
Creating Vibrant Gradients and Soft Edges
Smooth transitions depend on creating consistent gradients between colors. Gradients are produced by mixing colors step-by-step to gradually shift from one hue to another. This often involves blending the corresponding paint on the palette first, then refining the transition directly on the canvas.
To achieve soft edges, artists apply paint while it’s still wet (wet-on-wet technique), using brushes with gentle, sweeping motions. This prevents harsh lines and creates seamless color flow. Adding small amounts of medium or water can extend drying time and increase blendability, but excessive dilution may reduce color vibrancy. Mastering this balance is key to vibrant gradients that appear natural rather than forced.
Balancing Value and Temperature in Blends
Value refers to the lightness or darkness of a color, while temperature describes its warmth or coolness. Controlling these elements during blending helps create depth and dimension in the artwork.
Adjusting value involves mixing colors with white (to lighten) or black (to darken). Keeping track of value changes maintains contrast and prevents flat-looking blends. Temperature management is crucial too; warm colors (reds, oranges) tend to advance visually, while cool colors (blues, greens) recede. Blending a warm and cool color requires careful mixing to avoid visual dissonance.
Artists who balance value and temperature create more realistic and engaging blends. This attention also enhances soft edges by ensuring that the transition between colors respects the natural shifts in both light and heat perception.
Tips, Troubleshooting, and Practice for Successful Blending
Blending acrylic paint requires control over color mixing, drying speed, and layering techniques. Understanding common pitfalls and approaches to slow drying helps maintain paint workability. Consistent practice with layering and brush handling improves blending outcomes over time.
Avoiding Muddy Colors and Common Mistakes
Muddy colors often result from overworking the paint. Repeatedly brushing wet paint can break down pigments, causing dullness. To prevent this, artists should blend gently with soft, sweeping strokes and avoid excessive agitation.
Using too much water thins acrylics beyond their binding capacity, leading to streaks and loss of vibrancy. Instead, a damp brush provides controlled moisture that smooths edges without diluting pigment intensity.
Working quickly is important because acrylics dry fast, often within minutes. Blending strategies should focus on wet-on-wet application before paint becomes tacky. Overlapping dry layers too heavily without control can create harsh transitions, hampering smooth blends.
Extending Drying Time for Better Results
The rapid drying speed of acrylic paint is a major challenge. Adding slow-drying mediums extends the open time, allowing more workability for blending gradients.
Mediums designed to retard drying keep paint wet longer without compromising adhesion or color. They can be mixed directly into the paint or applied between layers to maintain softness.
Alternative methods include misting the palette with water or covering palettes to retain moisture. Using a stay-wet palette system also preserves paint freshness during sessions.
These approaches give artists extra time for wet-on-wet blending, creating smoother color transitions and avoiding hard edges caused by tacky or dry paint.
Practicing Consistency and Layer Control
Practicing consistency in paint thickness and brush pressure leads to better blending control. Uniform layers prevent uneven drying and texture buildup that disrupt smooth gradients.
Developing a steady hand with varied brushes—flat for broad blending, filbert for curves, and fan for soft edges—enhances precision. Switching brushes between colors helps avoid muddy mixtures.
Layer control is critical. Allowing each layer to dry slightly before adding additional layers with dry blending techniques adds depth without merging colors unpredictably.
Regular experimentation with color mixing ratios and blending methods helps painters discover personal techniques that balance speed, smooth transitions, and finish quality.